MergeManager
- DarkLight
MergeManager
- DarkLight
Article Summary
Share feedback
Thanks for sharing your feedback!
Overview
Matillion ETL users can integrate their jobs with Git to implement source control.
The MergeManager dialog lets users efficiently view and resolve merge conflicts between branches by viewing a narrative difference of Ours and Theirs.
Below is a simplistic example that demonstrates how, via the MergeManager dialog, users can view and resolve changes to jobs, components, and component properties—with the differences between Ours and Theirs now defined with a greater level of granularity.
The MergeManager dialog is titled Resolve Conflicts in the Matillion ETL User Interface, and will be labelled as such in this example.
Resolving Merge Conflicts with the MergeManager dialog
1. A local repository is initialized by clicking Project and Git, then selecting Init Local Repository from the Git Integration dialog and clicking OK to confirm the initial commit.
2. Two additional versions are created in Manage Versions so that the version list is as follows:
- default
- developer-1
- developer-2

To learn more about versions in Matillion ETL, read Manage Versions.
3. While on the default version, a Transformation Job is created. A Fixed Flow component is added to the canvas and set up with two columns:
- payment_reference
- payment_amount
One row of data is added in the Values property: mortgage | 500.

4. This work is then committed.
5. Next, another member of the team switches to their version, developer-1, and creates a new branch in the Git Integration dialog labelled developer-1_first-branch, and makes additional changes to the Fixed Flow component.
6. These changes are committed on the branch labelled developer-1_first-branch.

7. Then, another team member switches to their version, developer-2, and creates a new branch in the Git Integration dialog labelled developer-2_first-branch, and makes their own changes to the Fixed Flow component.

8. The original team member who initialized the repository then switches back to the default version and opens the Git Integration dialog to observe commits that need reviewing and merging.
9. An attempt to merge the branch developer-1_first-branch is made by clicking and confirming all details are correct in the Merge dialog. However, when the user clicks OK in the Merge dialog, the merge is unsuccessful.
10. The user receives a notice that Conflicts were found while merging. To begin the merge conflict resolution process, click Resolve. Otherwise, to exit the merging process, click Close.

11. Clicking Resolve returns the user to the Merge dialog, which will now display a table of merge conflicts. The table shows the path of any conflicting items, as well as their status (e.g. unresolved, resolved). To access the Resolve Conflicts resolution dialog, users need to click Change in the Action column corresponding to the merge conflict they wish to resolve.

12. The Resolve Conflicts dialog displays a narrative table that lists jobs, components, component properties and activation statuses, and more.
The Resolve Conflicts dialog is highly customizable and users can:
- Expand and contract the nested rows for jobs and components by clicking and .
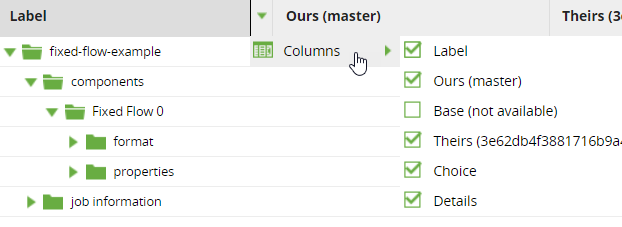
- Hover over any of the column headings to reveal a icon. Click this icon to reveal a dropdown that allows you to add or remove columns from the table. For example, the Base column is hidden by default but can be shown if required.
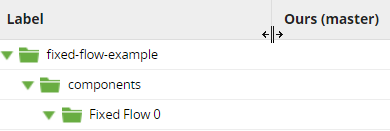
- Resize a column by dragging the dividing line in the column header to the left or the right.
- Use the dropdown field in the top-left of the dialog to choose what the narrative table will display, as follows:
- Full view displays the full list of Job elements, including those which are not relevant to the merge conflicts.
- Differences view filters out irrelevant Job elements (such as those which are blank) to make it easier to see those elements where there are differences. This is the default view for the table.
- Conflicts view shows only those elements that have unresolved conflicts, i.e. those you will directly need to address to merge successfully.
- Where details of a conflict are truncated in the table rows, you can click the icon at the end of the row to open the Conflict Details dialog displaying the full details.
13. Using this table, you can establish which jobs, components, and component properties have differences and choose which values you want to keep in each case. The number of unresolved conflicts is shown in the top-right of the Resolve Conflicts dialog, and these conflicts are highlighted in the narrative table. All of these conflicts must be resolved before the merge can be completed successfully.
Use the dropdown field in the Choice column to select Ours or Theirs for each item that shows a conflict.

This process is repeatable each time a merge conflict is found.